How to Clean Grout: Tile & Grout Cleaning Tips
3 Ways to Clean Grout Between Tiles
Even people who keep a clean home know that mopping floors and wiping walls isn’t enough to keep your tile grout clean. Once in a while, you’ll need to clean the grout between your tiles to get rid of dirt and soap buildup. You can get this done by booking a cleaning service and adding the ‘deep clean’ extra. Alternatively, you can do it yourself with some household products and a little elbow grease.
In this post, we’ll share 3 methods that explain how to clean grout between tiles so that they look brand new again.

Source: Decoist
How to Clean Grout with Baking Soda & Vinegar
Step 1: Prep the Area
Before you clean the grout between your tiles, it’s always a good idea to clean the tiles first. If the tiles are on your floor then give them a good mop. If the tiles are on the walls then wipe them down with a moist cloth and a cleaning solution; all purpose kitchen or bathroom cleaner will do.
Pro Tip: If you’ve got a big area to work on then you can even mop the walls too. However, this is only recommended if the floor is also tiled, like it would be in your bathroom. Also, make sure you do the walls first so you can mop up any run off when you do the floor.
Step 2: Prepare the Cleaning Paste
Mix 1 part water (e.g. 1/4 cup) with 3 parts baking soda (e.g. 3/4 cup) to form a paste. While this paste is a versatile cleaning solution that will work with all colours of grout, vinegar can be harmful to some natural stone like marble and limestone.
Apply the paste to the lines of grout using your finger. While baking soda isn’t harmful, we suggest using rubber gloves to prevent scratching or irritating your skin when you rub the paste into the grout.
Step 3: Prepare the Cleaning Solution
Mix 1 part vinegar with 1 part water (50:50 solution) in a spray bottle. Then spray the paste on the grout with this solution. Immediately, you should see the paste start bubbling, which indicates that the cleaning process has begun.
Remember: Don’t use vinegar on marble or limestone. You might need to get a gurney or pressure washer out for them.
Step 4: Give it Time to Work its Magic
The bubbling is the result of a chemical reaction between the baking soda and vinegar. This will last a few minutes. When the bubbling stops, you’ll know that the chemical reaction is done and the cleaning has taken place.
Step 5: Scrub the Grout with a Brush
Using a nylon bristled brush (like a dishwashing brush or an old toothbrush), scrub the moist paste into the grout.
Tip 1: Scrub along the lines of the grout so the bristles spend most of their time working on the grout rather than the tiles
Tip 2: Pay extra attention the intersecting corners and edges of the grout lines to make sure these areas get cleaned well.

Source: Bren Did
Step 6: Clean Up the Mess
Using plain water, mop the floor to remove the paste. If you’re cleaning grout on walls, then do this area first and then clean up anything that drips onto the floor. Make sure you rinse the mop and change the water frequently while you’re doing this so that you don’t end up just spreading the mess around.
Book a deep clean online instantly and we’ll clean your grout for you!
How to Clean Grout with Hydrogen Peroxide, Baking Soda & Dishwashing Soap
Step 1: Prepare the Area
Using the same method described above, prepare the area for deep cleaning.
Step 2: Prepare the Cleaning Paste
Mix 3 parts baking soda with 1 part hydrogen peroxide. Then add a tablespoon of dishwashing liquid to form a paste. The 3 ingredients in this powerful paste clean grout in specific ways:
1. The baking soda acts as a mild abrasive;
2. The hydrogen peroxide creates a chemical reaction when combined with the baking soda, which releases bleaching oxygen ions;
3. The dishwashing liquid helps to dissolve grease and dirt so it can be removed more easily.
NOTE: This method may also cause damage to tiles due to the bleaching oxygen ions that are released. If possible, first test it out on a small patch that’s generally hidden from view.
Step 3: Apply the Paste with a Brush
Using a nylon bristled brush or gloved fingers, apply the paste to the grout. Ensure that all areas that you want to clean are properly coated with the paste so that you get an even result.
Step 4: Daydream About How Beautiful Your Home Will Look
The paste needs at least 15 minutes to work its magic. Like the pervious method, you may see some bubbling happen as it does its thing. Give it a bit of time to ensure that the paste fully remove the stains in the grout.
Step 5: Final Clean
Using warm water, mop up the the paste. Make sure you follow our recommendations in Step 6 of the previous method. If you’re doing a large area, you may want to start by using a moist cloth to clean up the bulk of the paste and then mop the area. Ensure that no residue if left behind, otherwise the soap could be slippery and the bleaching may effect the tiles if left for a long period of time.
Book a deep clean online instantly and we’ll clean your grout for you!
How to Clean Grout with Bleach
If all else fails then you could always try good old fashioned bleach. While it’s super effective at cleaning grout, there’s a good chance that it may damage certain tiles. We usually advise only using this method on white tiles, like the ones you may find in your bathroom (and particularly when the grout it white too).
If you’re going to clean grout with bleach, it’s a good idea to test it out on a small patch that is generally out of sight so you can check for colourfastness. It’s also a good idea to use gloves and wear old clothes as you may end up getting some bleach on them if you’re not careful.
Step 1: Prepare the Area
Using the same method described above, prepare the area for deep cleaning.
Step 2: Apply the Bleach
Pour or spray the bleach onto the grout lines, making sure that you apply enough to fully cover all of the grout. Just do one section at a time to avoid getting bleach on your clothes and ruining them. Allow the bleach a few minutes to soak in and then get to work.
Step 3: Brush the Bleach into the Grout
Using a nylon bristled brush, work the bleach into the grout. Scrub back and forth along the grout lines. Make sure you get the corners where dirt is most likely to accumulate.

Source: Bunnings
Step 4: Apply More Bleach Where Necessary
For tough to clean spots, apply more bleach or dip the scrubbing brush into a glass of bleach and scrub again. More bleach = more cleaning power.
Step 5: Rinse the Floor
Using warm water, wipe or mop up the the bleach. Make sure that you do this thoroughly as any bleach left over will get into your socks and could get transferred into your carpets, which would be a disaster!
Book a deep clean online instantly and we’ll clean your grout for you!
Check Out Our Other Posts

Experts Share the Best Way to Load a Dishwasher
This article shares tips from experts on the best way to load a dishwasher. These tips and tricks can help you in many ways – they can help ensure that your dishes are sparkling clean each time, whilst also ensuring a minimal risk of damage to anything that you place in the dishwasher.
How to Clean a Flat Screen TV
You need to be careful when you clean your flat screen TV. You don’t want your television, one that may have cost you thousands of dollars, damaged through the wrong cleaning process.

How to Keep Toys Tidy – 10 Top Tips from the Expert
Teaching your kids how to keep toys tidy is important for your sanity. There’s nothing worse than risking stepping on a piece of lego in the middle of the night! We’ve put together 10 tips to make it easier to keep toys tidy.
How to Clean a Bathroom Extractor Fan
It’s important that you regularly clean your bathroom extractor fan. The problem is that most people don’t know how to clean a bathroom extractor fan. That’s why we wrote this guide. This guide gives you a simple process to follow that should only take 15-20 minutes.
How to Remove Stains on Painted Walls before Moving Out or before an Inspection
Whilst there are some similarities between them, when you have to remove stains on painted walls, there are also some differences. There are a few common types of wall stains. The most common is usually scuff marks or bumps from furniture. Other common types of stains are oil stains or water based stains.
The Experts Share their Best Tips for Cleaning Toilet Bowl Stains
Cleaning toilet bowl stains – tips and tricks from the experts. This article covers common causes of toilet bowl stains on how to remove them.

Best Way to Clean Window Blinds – Tips from the Experts
Tips from the experts on the best way to clean window blinds – no matter what style of blinds you have in your home – Venetian blinds, roller blinds, or vertical blinds.
The Best Way to Clean Glass Shower Doors
With this article we wanted to share with you the best way to clean glass shower doors and ensure they continue to sparkle long into the future.
Top Tips For Cleaning Your Fridge
Cleaning your fridge will be a breeze with these handy tips. Get the order right to save time and prevent spoiling food or damaging the fridge.
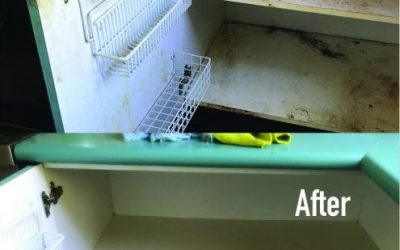
Clean Kitchen Cabinets – Tips & Advice
Clean kitchen cabinets are important for the health and wellness of your family. There’s nothing worse than finding a bug infestation or mould in your pantry. Yuk! Here are the recommended steps we think you should follow for cleaning your kitchen cabinets – after you have emptied them.