

 1300 245 417
How to Clean Grout: Top Tips & DIY Techniques
Key Takeaways
- Identify Your Grout Type: Start by understanding whether you have cement-based or epoxy grout. This prevents damage and ensures the correct cleaning method.
- Follow a Step-by-Step Process: Successful grout cleaning is more than scrubbing. It’s about the process of prepping, applying the right solution, agitating, and rinsing.
- Long-Term Maintenance: Keep your grout clean with consistent care. Seal it, use pH-neutral cleaners, and ensure the area dries to prevent future stains and mould.
It’s a familiar sight for any homeowner. You scrub your tile floors until they shine, only to see the dirty, discoloured lines of grout. It feels like a losing battle, but with the right approach, it’s a simple problem to solve! This guide will show you exactly how to clean grout and restore that fresh new look to your tiles.
Types of Grout and Common Problems
When it comes to tile grout cleaning, the first step is to understand your grout type to avoid damage and identify the best approach.
Cementitious Grout
Porous, cement-based grout. Comes in sanded and unsanded varieties, requires sealing to prevent stains.
- How to Identify: It has a matte, chalky finish and feels gritty if sanded. A damp cloth will leave a powdery residue, and it darkens when wet.
- Common Problems: Prone to staining, mould, and mildew. Acidic cleaners can easily damage its surface.
- Cleaning Technique: Use pH-neutral cleaners. Steam cleaning is effective for stains, and sealing prevents future issues.
Epoxy Grout
Non-porous, highly durable, and stain-resistant. Ideal for wet areas like kitchens and bathrooms.
- How to Identify: Look for a smooth, hard, and shiny or plastic-like finish. It won’t darken when wet, and water will bead up on the surface.
- Common Problems: Rapid curing makes application difficult. Post-installation residue must be removed quickly before it hardens.
- Cleaning Technique: Use mild detergents. Avoid acid-based or abrasive cleaners that can cause scratches.
Urethane Grout
A flexible, durable polymer-based grout that is resistant to stains and does not require sealing.
- How to Identify: It has a smooth finish and feels slightly softer than epoxy. It’s flexible when you press it and has a consistent colour without sand grains.
- Common Problems: More expensive and difficult to remove once cured. May discolour from harsh chemicals.
- Cleaning Technique: Use pH-neutral cleaners. Avoid abrasive cleaners or strong solvents. A simple wipe-down is often enough for maintenance.
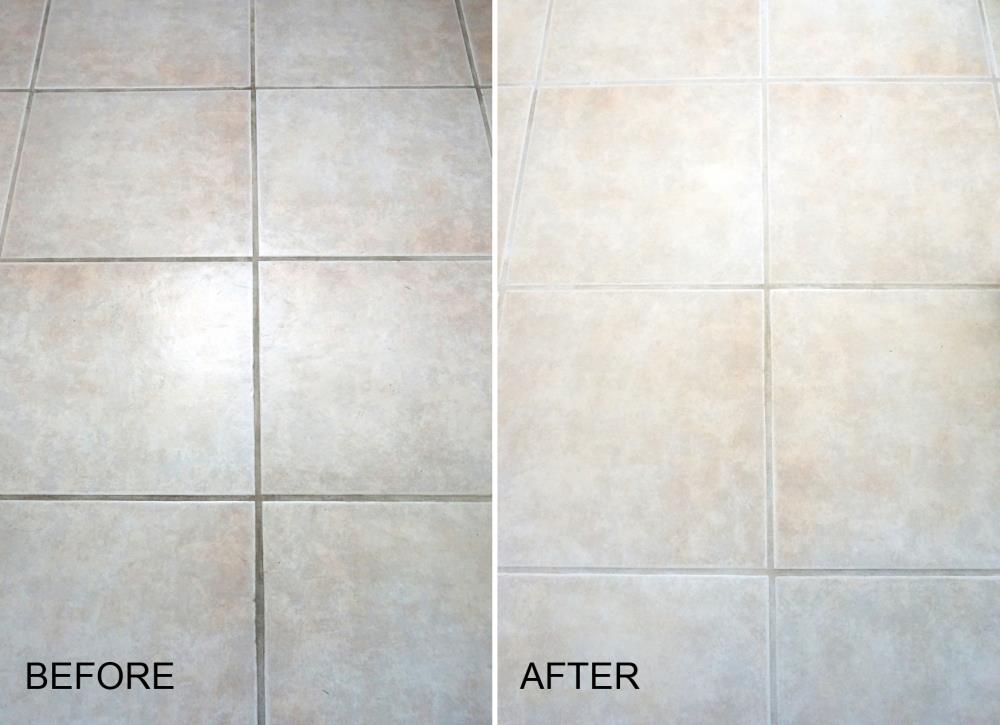
Source: Decoist
Step-by-Step Guide to Cleaning Grout
Ready to get rid of those ugly stains for good? This simple, proven process is used by our pro cleaners for effective grout stain removal.
1. Prep the Area
Before you get to the grout, it’s always a good idea to clean your tiles first. This simple step removes loose dirt and debris, ensuring you don’t just spread grime around as you clean the grout lines.
- Pro Tip: For floor tiles, run a vacuum with a brush attachment over the area before you mop. It’s the most effective way to remove all loose dirt and debris.
2. Apply Your Cleaning Solution
Once your tiles are prepped, it’s time to apply your cleaning solution. The best option depends on the type of stains and how dirty your grout is.
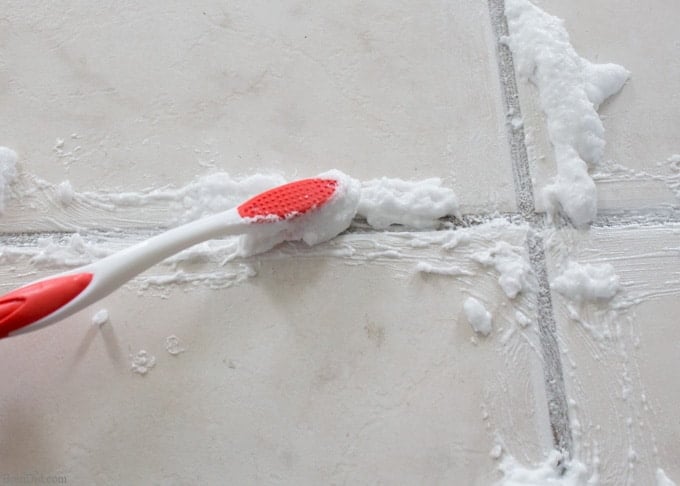
- For Light Cleaning: For general grime, apply a paste of baking soda and water or a 50/50 spray of vinegar and water.
- For Tough Stains: For stubborn, set-in stains, use a store-bought grout cleaner and a dedicated grout brush to work the product into the grout lines.
- For Mold/Mildew: To safely tackle mould and mildew, apply a specialist cleaner or a paste made with hydrogen peroxide to lift these stains from the grout.
3. Let It Work Its Magic
Once you’ve applied your solution, give it time to work its magic and penetrate the grout lines. Allowing the cleaner to sit for 5 to 15 minutes gives the ingredients enough time to break down stains and grime.
- Pro Tip: Don’t let the solution dry out, as this can trap dirt. For stubborn stains, lightly spritz the area with more water to keep the cleaner moist and active.
4. Scrub and Agitate
Once your solution has had time to soak, grab a stiff, nylon-bristled brush to agitate the grout. Use a back-and-forth motion to scrub along the grout lines, lifting the dirt and stains that have been broken down.
- Pro Tip: Scrubbing along the grout lines ensures your bristles are focused on the dirt. Pay extra attention to corners and edges, where grime tends to build up most.
5. Rinse and Clean Up
The final tile grout cleaning step is to thoroughly rinse the area with plain water. This is crucial for removing all residue, which can attract dirt and cause your grout to get dirty faster.
- Pro Tip: For a spotless finish, be sure to frequently rinse your mop or cloth and change the water often. This prevents dirty water from spreading back into the grout lines.
5 Grout Cleaning Tips for Long-Lasting Shine
For long-lasting results, here are the best grout cleaning tips to keep your tiles looking new.
- Seal Your Grout: After a deep clean, seal cementitious grout to protect it from stains and moisture, making routine cleaning easier.
- Use a Steam Cleaner: Use a steam cleaner to loosen deep-seated dirt and kill mould in grout lines without harsh chemicals.
- Use Oxygen Bleach: For a professional touch, mix powdered oxygen bleach with boiling water to deeply clean and brighten grout without damage.
- Practice Routine Care: After any moisture exposure, wipe grout lines dry with a microfiber cloth to prevent residue buildup and discoloration.
- Ensure Proper Ventilation: Immediately dry the area after cleaning or showering using a fan or open window to prevent mould and mildew.
Grout Cleaning Tools and Products
For a professional grout clean, the right tools are essential. Here are the best grout cleaner tools and products for the job.
- Grout Brushes: Stiff-bristled brushes are essential for scrubbing grout lines. A small brush or toothbrush is perfect for detailed work.
- Grout Cleaning Pens & Gels: Use pens for targeted stain removal and gels for vertical surfaces, as they cling to dissolve grime.
- Drill Attachments: Brush attachments for power drills provide powerful scrubbing for large or heavily stained areas with minimal effort.
- Steam Cleaners: A low-pressure steam cleaner uses heat to safely penetrate grout pores and lift dirt without chemicals.
- Best Grout Cleaners: For great results and ease of use, we recommend Zep Grout Cleaner and Brightener, Grout-Eez Cleaner, and Pink Stuff Multi-Purpose Cleaner.
Frequently Asked Questions
1. How do you clean grout without damaging tiles?
The key is to use a cleaner that won’t harm your specific grout type. For cement-based grout, always use a pH-neutral cleaner to avoid damage and prevent dissolving the surface.
2. Can I use bleach to clean grout?
Yes, you can use diluted bleach on white grout, but always test a small, hidden spot first to check for colourfastness. This powerful option can also damage some tiles and should be used with caution.
3. How often should I clean grout in the bathroom?
For the best results, complete your bathroom grout cleaning every 2-3 months. This prevents a heavy buildup of grime and mildew. In between deep cleans, a simple wipe-down after each use helps maintain it.
4. How can I prevent grout from getting dirty again?
Sealing your grout is the best way to prevent future staining. Additionally, simply wiping the area dry with a cloth after each use prevents moisture from collecting and causing mould.
5. Does a standard house clean include grout and tile cleaning?
Yes – sweeping, mopping, and sanitising floor tiles is included in every house cleaning service in Sydney. If you want to tackle stubborn grout stains yourself between visits, our how to clean grout guide walks through the full process.

Source: Bunnings
Putting an End to Stubborn Grout Stains
Learning how to clean grout is the best way to keep your tiles looking brand new. Sure, the right techniques and maintenance make a huge difference. But we know deep cleaning can be a demanding task.
So, when you don’t have the time, our house cleaning service in Sydney and house cleaning service in Melbourne include grout and tile upkeep as part of every regular clean. Get a free quote today and let us do the hard work for you!
Check Out Our Other Posts

How to Clean Roller Shutters (inside and out)
Learn how to clean roller shutters both inside and out, along with a few simple habits that will keep them running smoothly for years to come.

How to Remove Musty Smell from Your Home This Winter
Searching for how to remove musty smell from your house? Let’s walk through a simple, step-by step process for tackling each room.

How to Remove Silverfish From Your Home
Let’s explore how to remove silverfish. We’ll cover the causes, and natural, no-fuss methods you can use to send silverfish packing.
How to Clean a Humidifier the Right Way
Learn how to clean a humidifier in his guide that walks you through everything, from quick daily rinses to thorough deep cleans.
How To Clean The Toilet Brush – The One Item That Gets Forgotten
If you’ve never stopped to think about how to clean the toilet brush, you’re not alone. Most people don’t. But if you want a truly hygienic bathroom, this is a step you simply can’t skip.

Clean Your Home, Keep Your Cash: Saving Money Tips
If you are looking for practical saving money tips, your daily cleaning routine is a great place to start. We’ll look at simple tricks for doing laundry, easy recipes for homemade cleaners, and daily routines that are good for your home and even better for your wallet.

Banish the Stink: How to Remove Smoke Smell from House and Furnishings
If you are wondering how to remove smoke smell from house items, this guide provides a thorough, easy-to-follow process to extract those stubborn odours.
Ultimate Guide on how to Clean Epoxy Floor: Tips for a Spotless Shine!
Welcome to your guide on how to clean epoxy floor, where we uncover great tips and tricks to bring out the brilliance of your flooring. Whether you’re tackling stubborn stains or performing routine upkeep, our guide will provide you with the knowledge to achieve a spotless shine that lasts.
Your Easy Guide: How to Clean Tiles Effectively
Let us walk you through how to clean tiles with vinegar, how to clean tiles without streaks, and cleaning tile grout using simple tools and budget-friendly solutions. Remove buildup and keep your tiles sparkling with our easy, expert-approved tile cleaning tips.

How to Clean Windows Without Streaks
Key Takeaways Follow a Systematic Process: The key to streak-free windows is following our step-by-step guide that works with gravity, ensuring you clean from top to bottom. Use the Right Tools & Solutions: Always use a squeegee, microfiber cloth, and the right...
Book a deep clean online instantly and we’ll clean your grout for you!
Book a deep clean online instantly and we’ll clean your grout for you!
Book a deep clean online instantly and we’ll clean your grout for you!